Googleカレンダーや、Microsoftの予定表、iCalendar形式(サイボウズ等)の予定をRemotty上に表示することができます。このページではGoogleカレンダー連携の方法を記載します。
※非公開の予定は表示されません。
※ Microsoftの予定表を利用している場合
※ iCalendar形式(サイボウズ等)を利用している場合
※ iCalendar形式(desknet's NEO(デスクネッツ ネオ))を利用している場合
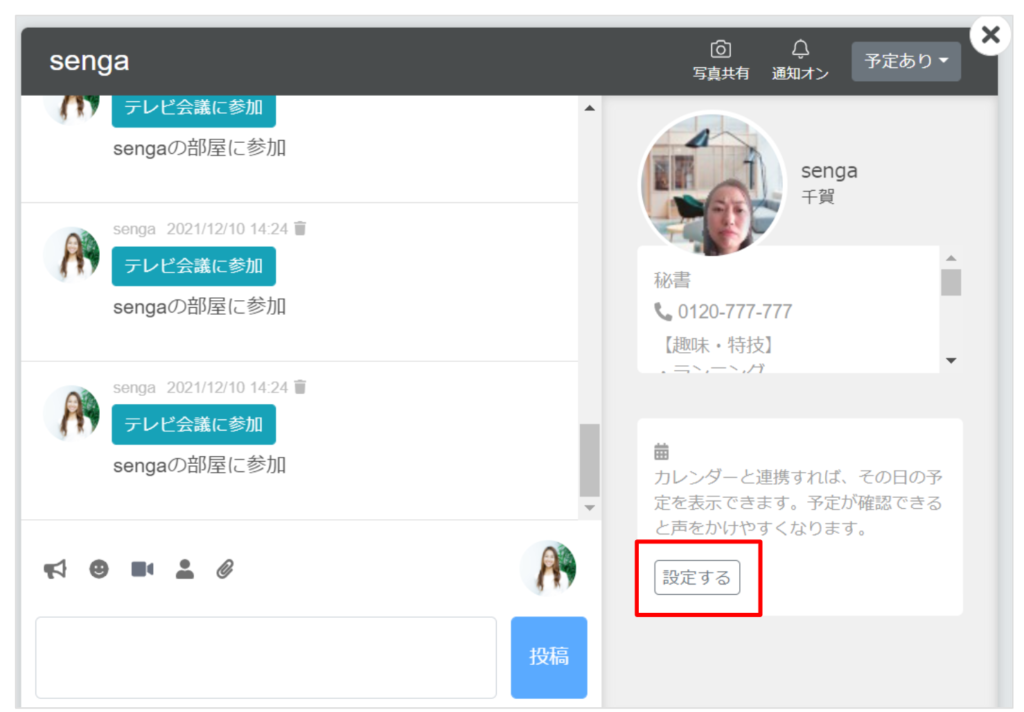
STEP①:自分の席でカレンダー連携を「設定する」をクリックします。
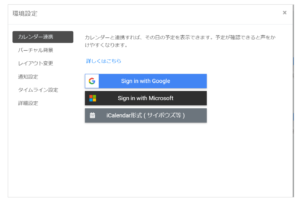
STEP②:「Sign in with Google」を選択します。
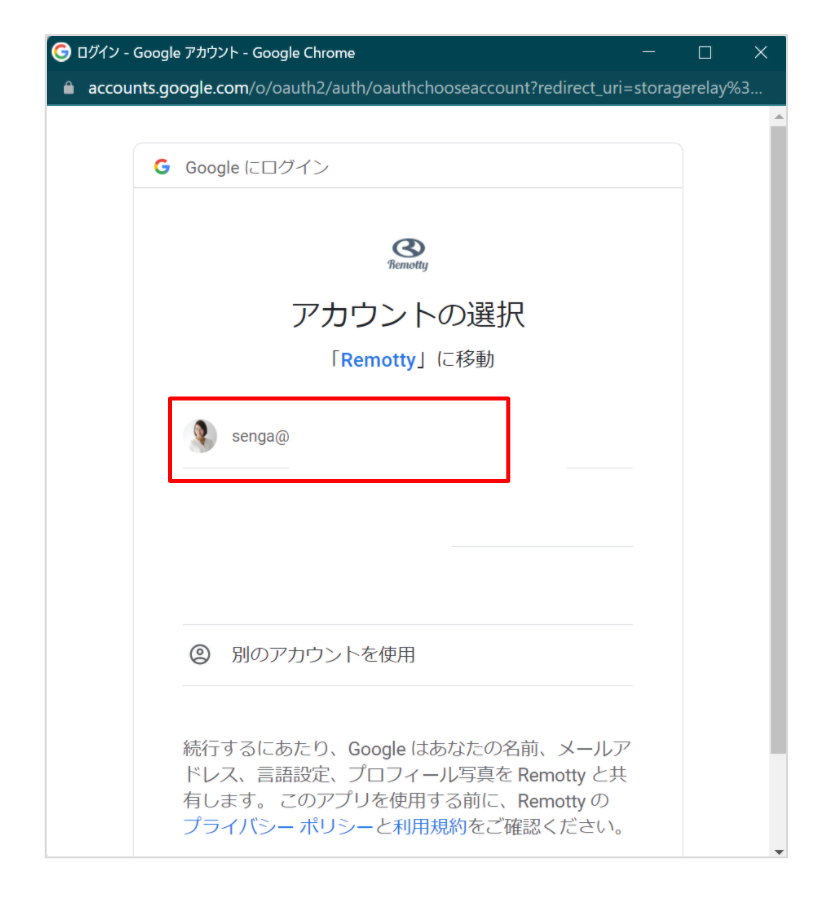
STEP③:連携するアカウントを選択し、「許可」をクリックします。
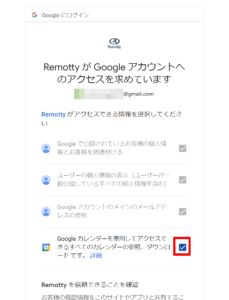
STEP④:RemottyのGoogleカレンダーへの参照、ダウンロードの許可のため、チェックボックスにチェックをいれて、「続行」をクリックします。
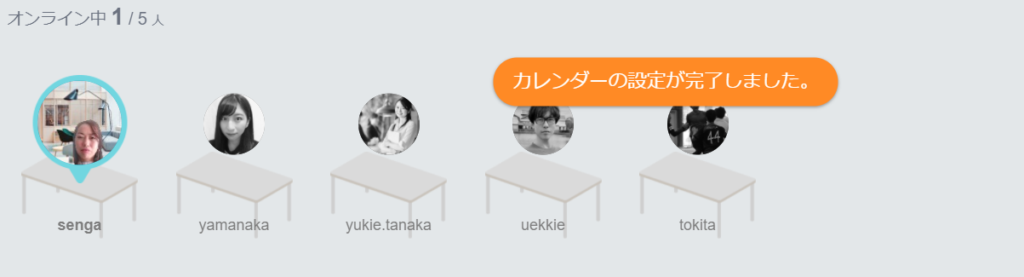
以上で設定完了です。
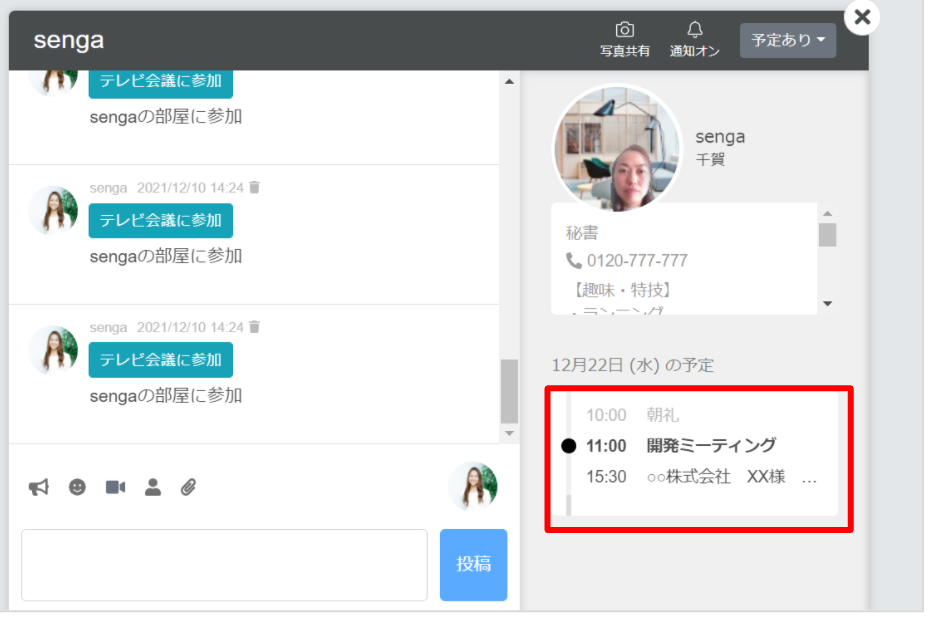
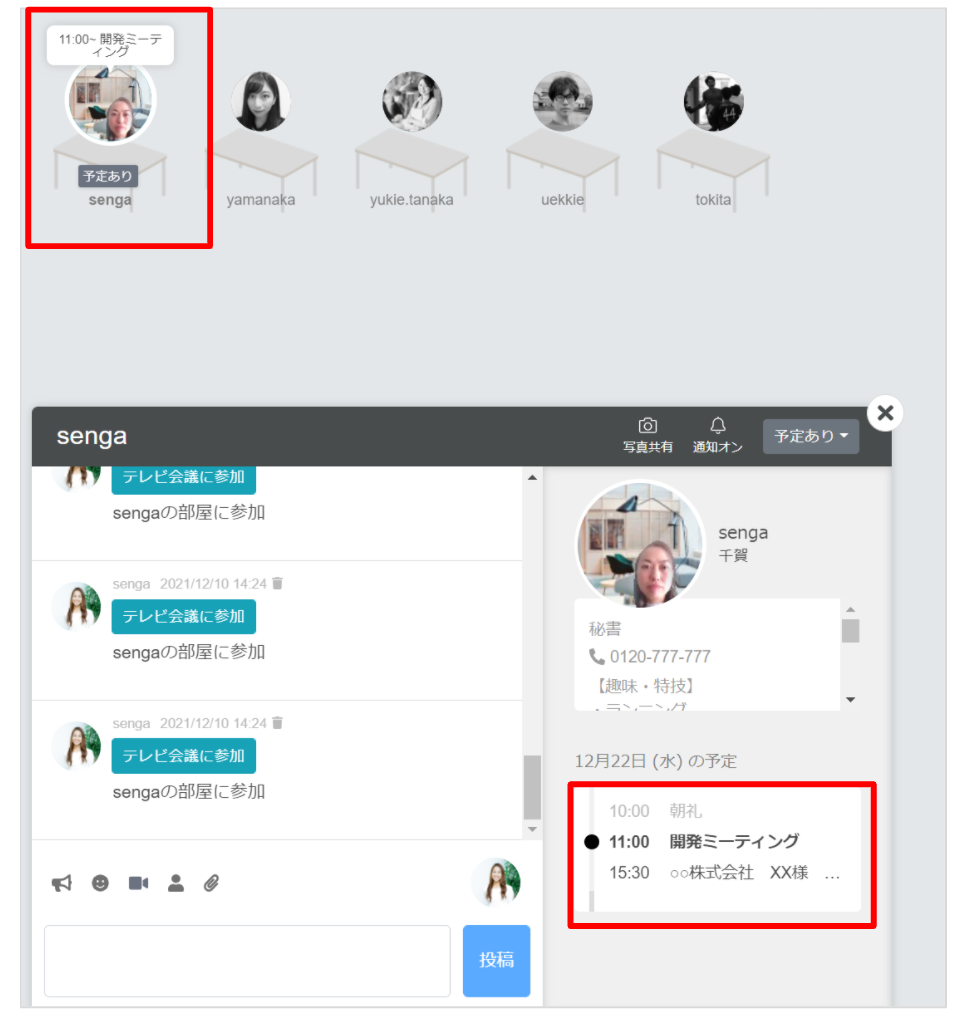
カレンダーが連携されると、予定時刻になると、自動的に吹き出しに予定が表示されます。
ステータスも「予定あり」に自動的に変更されます。
ステータスの自動に変更を行わない方法についてはヘルプページ「ステータスの自動変更を行わない方法」をご覧ください。
カレンダー連携を解除したい場合
一度連携したカレンダーを解除する場合は、右上の自身のアイコン「環境設定」「カレンダー連携」から連携解除可能です。
